In this guide, you'll learn how to create app trigger actions in MindCloud. An app trigger starts workflows automatically based on events in external applications. For example, when an issue is created in Linear or when a message is received in Slack.
There are two types of triggers you can create, depending on the app's API apabilities:
On Demand (webhook-based)
Polling (interval-based)
We'll cover when to use each type and walk through the setup process.
On Demand Trigger
Always check if an On Demand trigger is possible first. These webhook-based triggers are preferred over Polling triggers because they're more efficient — your workflows respond instantly to events without constantly checking for updates.
Our Example: Creating "On Client Created" action for Jobber app
First, let's check if the app's API supports webhook creation. For Jobber's GraphQL API, searching the schema for webhook mutations confirms this capability:

Setup Steps
Enable triggers for your app
Go to App Home and verify that triggers are enabled.

Create the trigger action
Click Add in the triggers section (left panel). In the modal:
Name your trigger (e.g., "On Client Created")
Select On Demand as the trigger type

Configure arguments
In the action, navigate to the Arguments tab. Based on Jobber's documentation, we'll need:

Topic: Create a hidden argument with the value
CLIENT_CREATE(this specifies which event we're listening for)URL: Create a hidden argument with the Is Webhook URL toggle active. This tells MindCloud to generate the webhook URL automatically
.png)

Set up the request
Since Jobber uses GraphQL (not REST), we'll need to customize the request:
In the action, go to Request > Outbound Mappers > Configure Action Mapper

In the code editor, reference the URL and Topic arguments we created
Build the mutation query using these values
Important: Make sure your query returns the webhook ID, we'll need this in the next step
Configure the webhook ID
This is crucial for MindCloud to track the webhook connection:
Go to API > Response tab
Open the Universal Response Mapper modal
Navigate to the Resource Extraction tab and scroll to the triggers section
Set the Webhook ID Key to tell MindCloud where to find the webhook ID in the response

Without this configuration, MindCloud won't be able to listen for incoming webhook requests.
Test your trigger
If everything is configured correctly, your webhook-based trigger is ready! To verify:
Add the trigger in a workflow and click on Connect
After webhook creation, the trigger should show as "Connected" and "Listening for requests..."
Create a test client in Jobber to confirm the webhook request is received

Polling Trigger
If the app's API doesn't support webhook creation, use a Polling trigger instead. Unlike webhook-based triggers, polling triggers work by checking for new data at regular intervals that you define.
Our Example: Creating "On Task Created" for ClickUp
Before building a polling trigger, verify the app's API has:
A list endpoint for the resource you want to monitor (e.g., "Get Tasks" for a task creation trigger). If the app doesn't have an action for this, we'll need to create it before the trigger!
Time-based filtering (ideally) in this enpoint, so we can fetch only new entries since the last check. Such as "created after" or "updated after" parameters
Setup Steps
Enable triggers for your app
Go to App Home and verify that triggers are enabled.
Create the trigger action
Click Add in the triggers section (left panel). In the modal:
Name your trigger (e.g., "On Task Created")
Select Polling as the trigger type
Configure polling intervals
In properties, set the minimum and maximum polling interval options that users can choose from when configuring the trigger. Default will be the minimum interval option.

Configure arguments
Define any arguments users need to provide when setting up the trigger. In our ClickUp example, the Get Tasks action requires a Team Id argument, so we'll add a Team Id lookup list argument that lets users specify which team to monitor.

Configure the Polling Request
This is the core configuration for polling triggers:
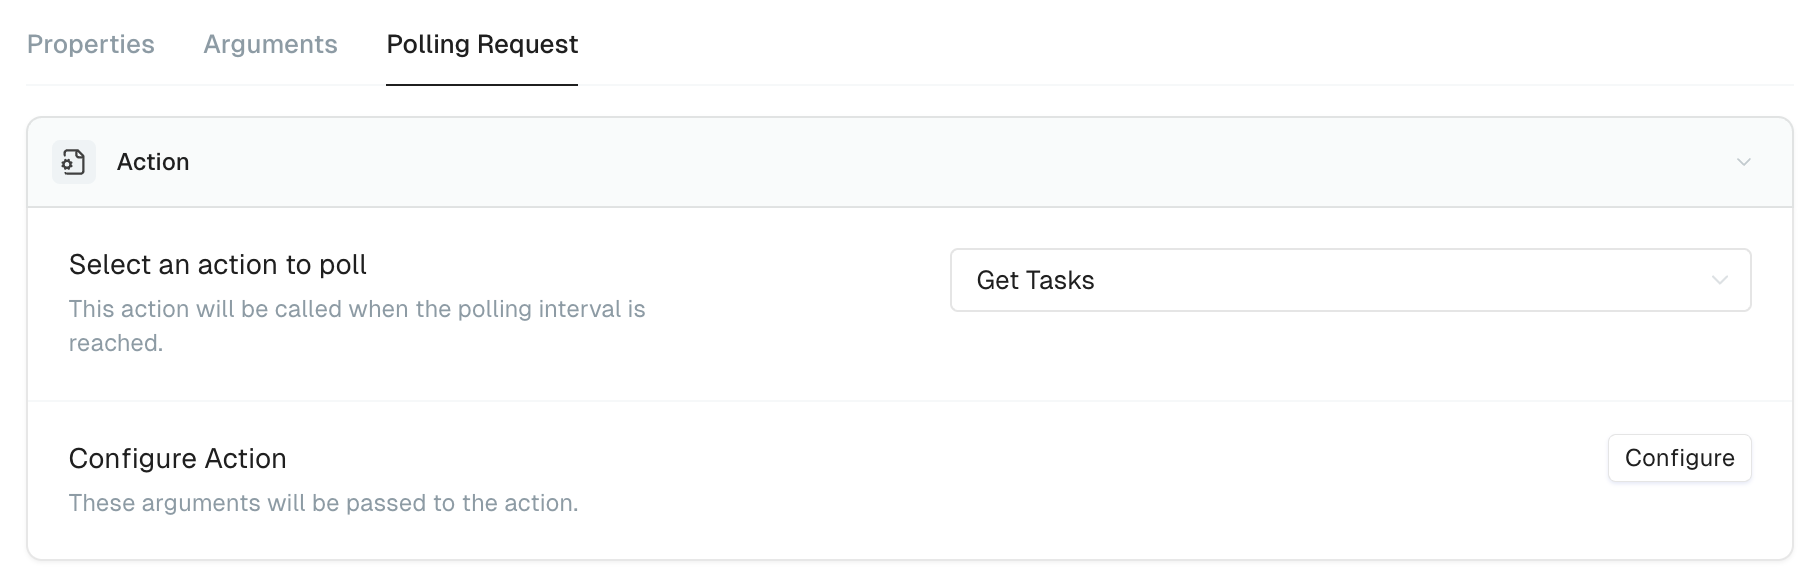
Select the action to poll: Choose from the list of Read actions (in our case, "Get Tasks"). If your action doesn't appear, make sure it's marked as a Read action in its properties.
Click Configure to open the action instance modal. This is where you'll set up the listing action to return only new data.

Key setup in the action instance modal:
Use the trigger object with interpolation syntax {{...}} to access:
{{trigger.arguments.teamId}}: Pass user-provided arguments (Team Id in our example) to our “Get Tasks“ action{{trigger.lastPollOn}}: The timestamp of the last poll. Pass this to your date filter argument (like "Date Created Greater Than") to fetch only entries created since the last check
Important: If the API doesn't support time-based filtering, you can use Post Processing to filter results, but avoid this when possible. It requires loading all entries and processing them on every poll, which is very expensive.
Test your trigger
If everything is configured correctly, your polling trigger is ready! To verify:
Add the trigger to a workflow
It should show as "Connected" with a countdown to the next batch fetch
For testing purposes,
{{trigger.lastPollOn}}defaults to 2 hours ago, so any entries created in the last 2 hours should appearVerify the request is successful, then create new entries and fetch again to see if they appear here
